Getting started
How to embroider a hat on a home embroidery machine (honest options)
How to embroider a hat on a home embroidery machine: why flatbeds lack cap frames, the patch method, floating a soft cap, and when you need a cap-frame machine.
As an Amazon Associate I earn from qualifying purchases. It does not change the price you pay. How we handle links.
The machines in this comparison
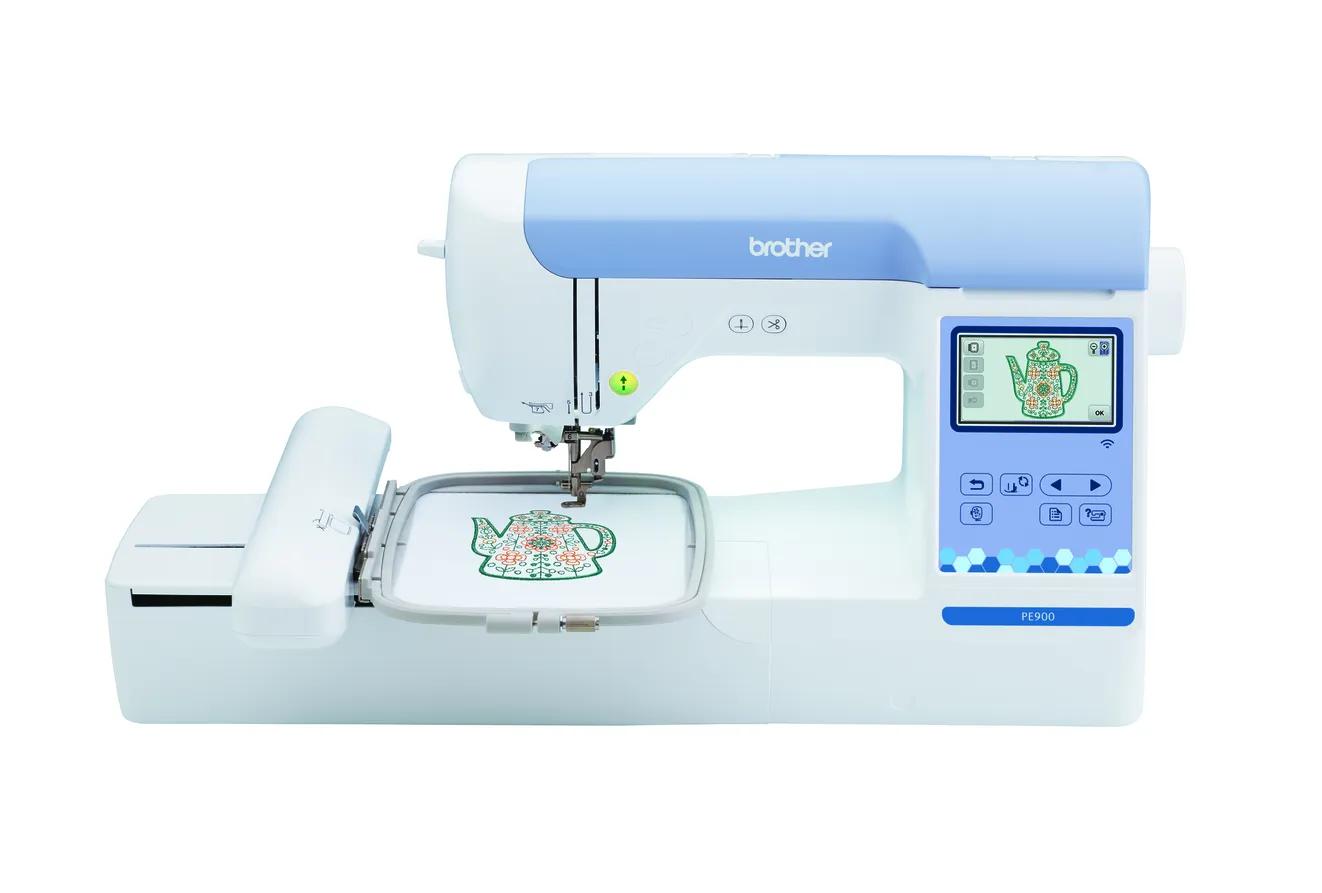 Check price
Brother PE900
5 × 7 in · Embroidery only · Wi-Fi
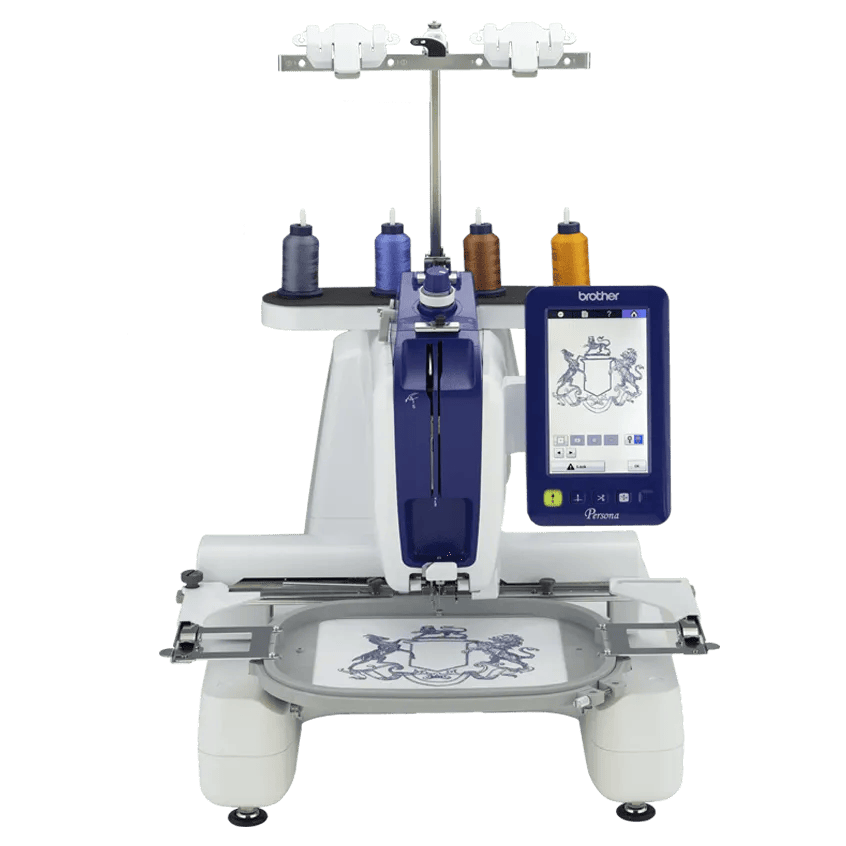 Check price
Brother PRS100 (Persona)
8 × 8 in · Embroidery only
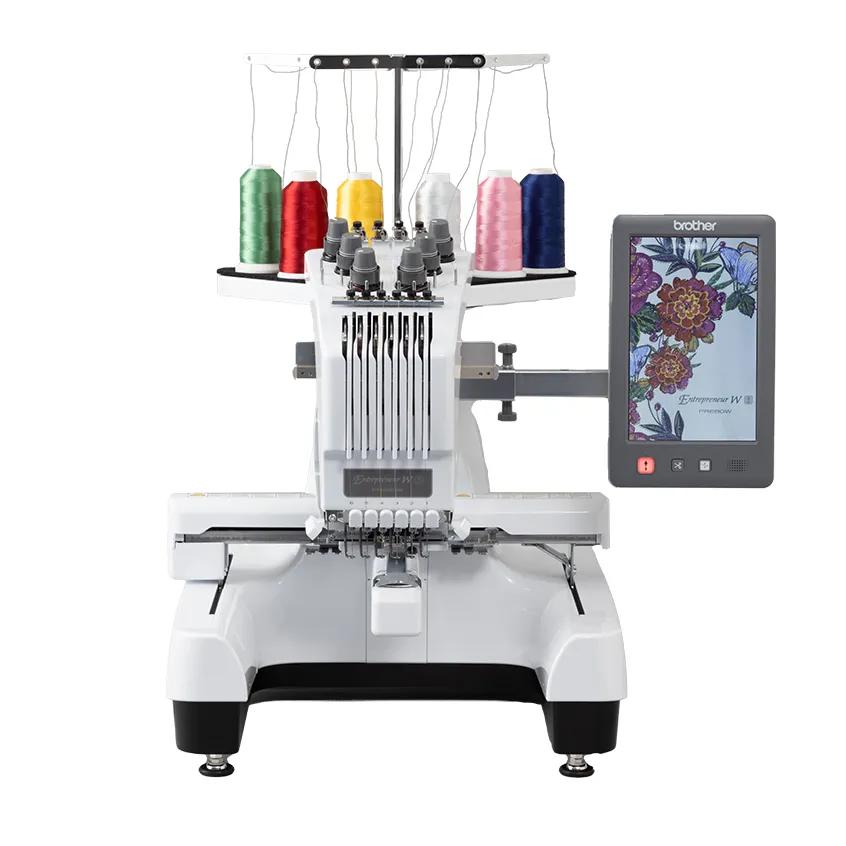 Check price
Brother PR680W
8 × 12 in · Embroidery only · Wi-Fi
Quick answer
Flatbed home machines like the Brother PE900 and SE2000 don’t list cap frames, so you can’t hoop a structured cap on them. You have two realistic options: embroider a patch and attach it to any cap, or float a soft, unstructured cap on hooped peel-and-stick stabilizer and stitch a small design, as OESD describes. If you want to embroider structured caps directly, you need a cap-frame machine such as the Brother PRS100 or PR680W.
- Of Brother’s machines we checked, only the PRS100, PR680W and PR1X list cap frame capability; PE, SE, NQ and PP1 pages don’t mention cap frames.
- A patch is the most reliable way to put embroidery on a structured cap with a flatbed machine.
- OESD’s floating method: soft unstructured cap, peel-and-stick stabilizer, small design, 90/14 needle, thread cutters off, slow speed.
Jump to a section
Caps are one of the most-requested embroidery projects and one of the hardest on a home machine. A structured baseball cap has a stiff, curved front, a thick center seam and a bill that gets in the way. Flatbed home machines are built to stitch fabric that lies flat in a hoop.
That doesn’t mean you can’t put embroidery on a hat. It means you should pick the method that fits your machine and your cap. This guide is honest about what works, what is fiddly and when a different machine is the better answer.
Can a home embroidery machine embroider hats?
It depends on the machine. Of the Brother machines we checked, only the PRS100, the PR680W and the newer PR1X list cap frame capability. Brother’s pages for the popular flatbed machines, including the PE900 and SE2000, and its NQ and PP1 models don’t mention a cap frame. We don’t assume a feature Brother doesn’t list.
| Machine type | Cap frame listed? | Realistic hat options |
|---|---|---|
| Flatbed 4 × 4 or 5 × 7 (PE545, PE900, SE700, SE2000) | No | Patch method; float a soft unstructured cap |
| Flatbed 6 × 10 (NQ1700E, NQ3550W) | No | Same as above, with room for bigger patches |
| Brother PRS100 (single needle, free arm) | Yes | Cap frame for structured caps, plus patches |
| Brother PR680W (6-needle) | Yes | Cap frame, automatic color changes |
| Brother PR1X (single needle, 8 × 12) | Yes | Cap frame for structured caps, plus patches |
Brother says the PRS100’s free arm reaches areas like caps, sleeves and bags, and lists a slower speed range for cap frames than for flat frames.
Option 1: Make a patch and attach it
A patch works on any cap, structured or not, because you never hoop the cap. It is the most predictable method on a flatbed machine.
Embroidery Library’s in-the-hoop patch method:
- Get an in-the-hoop patch design. Embroidery Library’s patch designs come with two files: the embroidery file and a dieline file marked “DL.”
- Prepare the patch fabric. Spray a piece of medium cut-away and smooth the patch fabric onto it. Print the dieline, spray the back, stick it on the fabric and cut the shape out.
- Hoop tear-away on its own. Embroidery Library recommends a fibrous tear-away that tears cleanly.
- Use a sharp needle. It recommends a 75/11 sharp sewing needle rather than an embroidery needle, because the finer point makes smaller perforations in the stabilizer.
- Stitch the dieline, place the cut fabric inside it, then let the machine stitch the tack-down, the design and the satin border.
- Tear the patch out of the stabilizer.
- Attach it with patch glue or hot glue, or sew it on, as Embroidery Library suggests.
Size the patch to the cap. OESD measures a typical standard cap’s flat stitchable area at about 3½ × 2½ inches, which fits easily in a 4 × 4 hoop. For the appliqué side of this technique, see appliqué for beginners.
Option 2: Float an unstructured cap on sticky stabilizer
OESD publishes a step-by-step method for embroidering a cap directly on a flatbed machine by floating it. It is fiddly and works best on soft caps. OESD says the more structured the hat is, the more difficult it is to embroider.
Step 1: Prepare the design
- Flatten the top front of the cap as much as possible. OESD says to measure only the area you can press flat against the table, and to invert or flatten the brim if you can.
- Choose a small design or reduce one to fit that area. Shrinking a stitch file changes density, so read embroidery design resizing first.
- Print a template with a center mark and audition it on the cap. When you’re happy, mark the design center on the cap.
Step 2: Prepare the hoop and cap
- Use a hoop slightly larger than the design, which OESD says gives you room to maneuver.
- Hoop a peel-and-stick stabilizer (OESD uses its StabilStick) with the paper side up.
- Score the paper and tear it away to expose the adhesive.
- Mark the center of the hoop.
- Press the cap’s embroidery area onto the stabilizer, lining up the center marks. OESD positions the cap so the bill faces you at the machine.
Step 3: Embroider
- Fit a 90/14 needle or larger. OESD says caps need it because of thicker fabric, lining and often stitching through a seam.
- Attach the hoop carefully so the cap doesn’t come loose.
- Turn off all thread cutters. OESD says the hoop movement during cutting could make the bill strike the machine.
- Don’t use the basting function, because OESD notes the basting box may extend past the area you can stitch.
- Slow the machine down if you can, and thread the needle by hand if the auto threader can’t reach.
- Watch constantly. Keep the fabric flat, keep the brim from folding into the stitching area and keep your fingers well clear of the needle.
- Remove the cap from the hoop and tear away the extra stabilizer.
OESD also points out that the back or sides of a cap are easier to embroider, because the bill isn’t in the way.
On machines with jump stitch trimming or automatic thread cutting, such as the PE900, look for those settings in the menu. Brother’s PE900 manual explains how to turn off both the end-of-color cutting and jump stitch trimming.
Floating checklist
- Soft, unstructured cap (dad hat, bucket hat or similar)
- Peel-and-stick stabilizer, larger than the hoop
- Small design that fits the flat area
- 90/14 needle
- Thread cutters and jump trims off
- Slow speed and full attention
Floating is covered in more general terms in our hooping guide. Hatch describes floating as hooping only the stabilizer and securing the material on top with spray adhesive or stick-on stabilizer.
Which needle should you use for hats?
Two makers give slightly different advice, because they’re describing different setups:
- OESD (floating a cap on a flatbed machine) recommends a 90/14 or larger.
- Madeira recommends sharp point needles for caps, along with twill, denim and canvas. For structured caps on cap frames, its cap stabilizer page suggests sharp needles (titanium or 80/12) to help prevent needle breaks.
For a home machine, follow your manual’s needle system and start with a sharp 90/14 on thick or seamed caps. Brother’s PE900 manual also suggests trying a 90/14 when stitching heavy fabric. More in the needles guide.
What about stabilizer made for caps?
Madeira’s E-Zee Cap is a tear-away cut to fit round cap frames, for structured caps on cap-frame machines. Madeira suggests steaming caps before hooping to soften the center seam and notes that two pieces can help with hard-to-hoop caps. That advice is aimed at cap frames, not flatbed floating, but it shows what dedicated cap machines use.
Which method should you choose?
- Choose the patch method if you have a structured cap, want repeatable results or plan to make several. It works on every flatbed machine.
- Choose floating if you have a soft, unstructured cap, a small design and the patience to supervise every stitch.
- Choose a cap-frame machine if caps are a main reason you’re buying, or you plan to sell hats. The best embroidery machine for hats compares the options, and single-needle vs multi-needle explains why businesses often move to machines like the PR680W.
Skip floating caps if you’re still on your first few projects. Get comfortable with flat fabric first using how to use an embroidery machine, then try a patch, then a soft cap.
Common hat problems on a home machine
| Problem | Likely cause | Fix |
|---|---|---|
| Brim hits the presser foot or machine | Bill in the frame’s path, or thread cutter moves the hoop | Turn off cutters; check the trace; consider the back or side |
| Needle breaks at the center | Stitching through the thick seam | Use a 90/14 or larger; move the design off the seam or use a patch |
| Design distorted | Cap not flat on the stabilizer | Choose a softer cap; smaller design; press firmly from the center |
| Fabric folds into the stitching | Brim or crown shifted | Stop, re-press it flat, keep watching |
| Cap won’t lie flat at all | Structured cap | Use the patch method |
For more project ideas that suit a flatbed machine, see what you can make with an embroidery machine.
Spec comparison
| Model | Field | Type | Designs | Max speed | Transfer | Shop |
|---|---|---|---|---|---|---|
| Brother PE900 | 5 × 7 in | Embroidery only | 193 | 650 spm | USB, Wi-Fi, Artspira app | Check price ↗ |
| Brother PRS100 (Persona) | 8 × 8 in | Embroidery only | 445 | 1000 spm | USB | Check price ↗ |
| Brother PR680W | 8 × 12 in | Embroidery only | 100 | 1000 spm | USB, Wi-Fi | Check price ↗ |
What to buy
- Shop on Amazon ↗
Adhesive (sticky) stabilizer
Lets you float items that are hard to hoop, such as collars, small pockets and bags. Choose tear-away or cut-away adhesive depending on whether the fabric needs lasting support. Learn more
- Shop on Amazon ↗
Tear-away stabilizerStart here
Temporary support for stable wovens such as canvas, denim, twill and quilting cotton. Tear gently while supporting the stitches; not a substitute for cut-away on stretchy fabric. Learn more
- Shop on Amazon ↗
Cut-away stabilizerStart here
Permanent support for knits, T-shirts, sweatshirts and anything that stretches. Medium weight suits most first projects; buy enough to test before the real garment. Learn more
- Shop on Amazon ↗
Embroidery needles (75/11)Start here
Embroidery needles have a larger eye and groove that protect rayon and polyester thread at speed. Use the needle system your manual specifies; buy a ballpoint pack for knits. Learn more
- Shop on Amazon ↗
Water- or air-erasable marking penStart here
Mark center lines and placement before hooping so the design lands where you planned. Test that the mark disappears from your fabric before marking a garment. Learn more
Frequently asked questions
Can a Brother PE900 or SE2000 embroider hats?
Not with a cap frame: Brother’s pages for these flatbed machines don’t list one. You can embroider a patch and attach it, or float a soft unstructured cap on adhesive stabilizer using a method like OESD’s.
What kind of hat is easiest to embroider on a home machine?
A soft, unstructured cap. OESD says the more structured the hat, the more difficult it is to embroider, and recommends flattening the front and measuring only the area that presses flat.
What needle should I use for embroidering a cap?
OESD recommends a 90/14 or larger for caps because of the thicker fabric, lining and seams. Madeira recommends sharp point needles for caps. Check your machine manual for the needle system it accepts.
How big can a design be on a hat?
It depends on the cap. OESD says to flatten the front and measure just the area that lies flat, and gives about 3½ inches wide by 2½ inches tall as typical for a standard cap. Print a template to check.
Which Brother machines have a cap frame?
Of the Brother machines we checked, the PRS100 Persona, the PR680W six-needle and the new PR1X list cap frame capability. Check whether the cap frame is included or sold separately for the bundle you buy.
Sources & method
This guide is compiled from manufacturer documentation and specialist sources, not hands-on testing. We link every source so you can check it. Specifications change, so confirm details against your exact model manual. How we research.
- OESD: How to embroider a cap
- Madeira: E-Zee Cap tear-away
- Madeira: The basics of 75/11 needles and when to use them
- Embroidery Library: Embroidered patches in the hoop
- Brother PRS100 product page
- Brother PR680W product page
- Brother PR1X product page
- Brother PE900 product page
- Brother SE2000 product page
- Brother PE900 operation manual (PDF)
- Hatch Embroidery: Machine embroidery hooping