Buying guides
Best embroidery machine for patches: size, hooping and starter picks
The best embroidery machines for patches pair the right field size with easy hooping: PE545 and SE700 for small runs, PE900 for bigger designs, PRS100 for hats.
As an Amazon Associate I earn from qualifying purchases. It does not change the price you pay. How we handle links.
Our picks at a glance
Full pros, cons & specs for each ↓Quick answer
The best embroidery machine for patches for most beginners is the Brother PE900: its 5 × 7 field covers 3–4 inch patches with room to spare, at up to 650 spm with Wi-Fi transfer. Choose the PE545 or SE700 if your patches stay small and you want to spend less on a 4 × 4 machine. Choose the PRS100 if you also want hats and tubular items on its free arm.
- Most patches need less field than you think: a 4 × 4 machine covers 2–3 inch patches.
- A 5 × 7 field earns its keep at 3–4 inches and for stitching multiples per hooping.
- Small items are hard to hoop: adhesive stabilizer or floating beats forcing twill into a hoop.
Jump to a section
Our shortlist
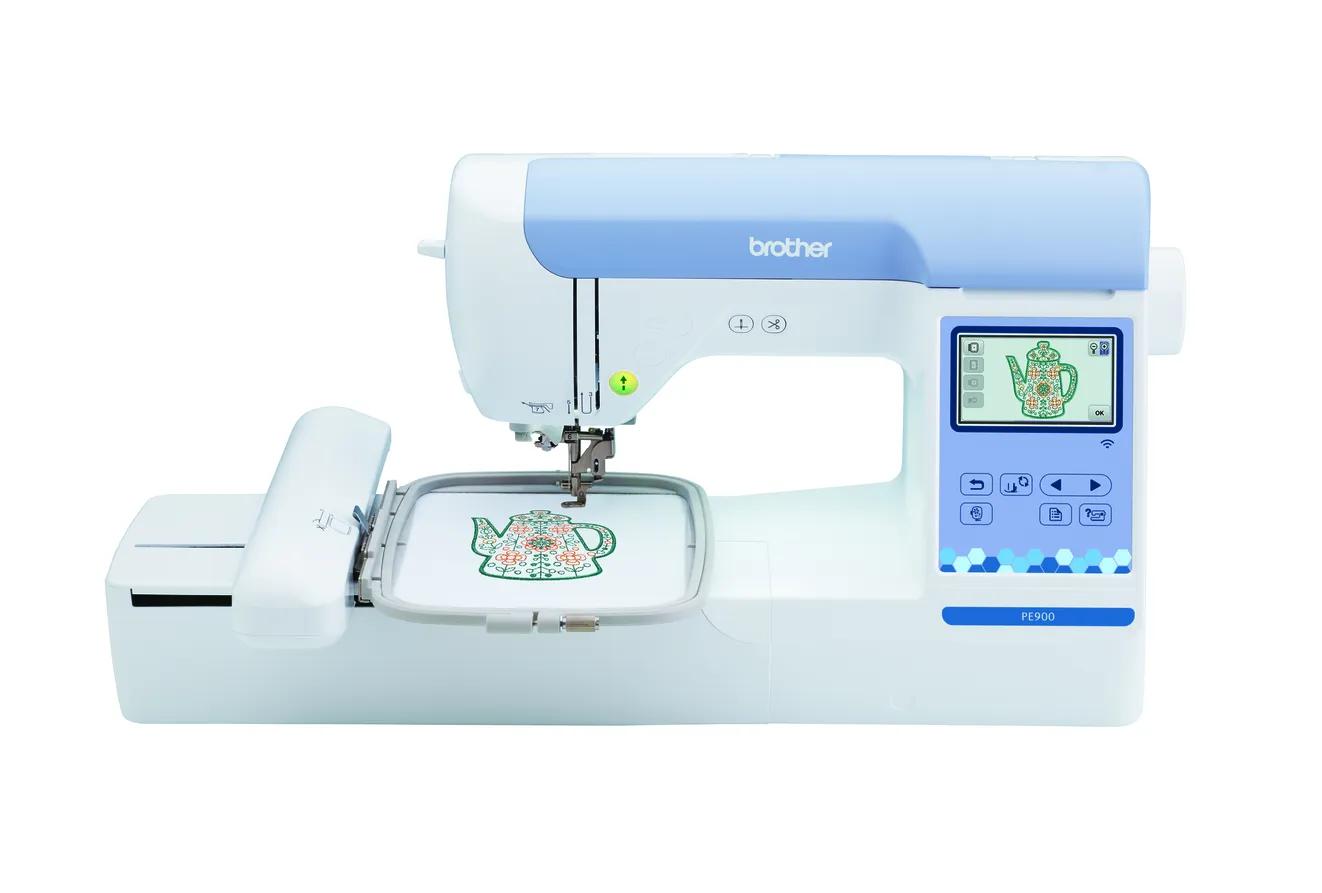
Brother PE900
Best for: Beginners who already sew (or do not need to) and want room for T-shirt fronts, totes and most popular design sizes.
- Field5 × 7 in (130 × 180 mm)
- TypeEmbroidery only
- Built-in designs193
- Max speed650 spm
- TransferUSB, Wi-Fi, Artspira app
Why pick it
- 5 × 7 field fits most popular design sizes
- Up to 650 spm
- Wireless transfer, Artspira and jump stitch trimming
Think twice if
- No sewing functions
- Single needle: you re-thread for every color
- Designs over 130 × 180 mm need splitting and re-hooping
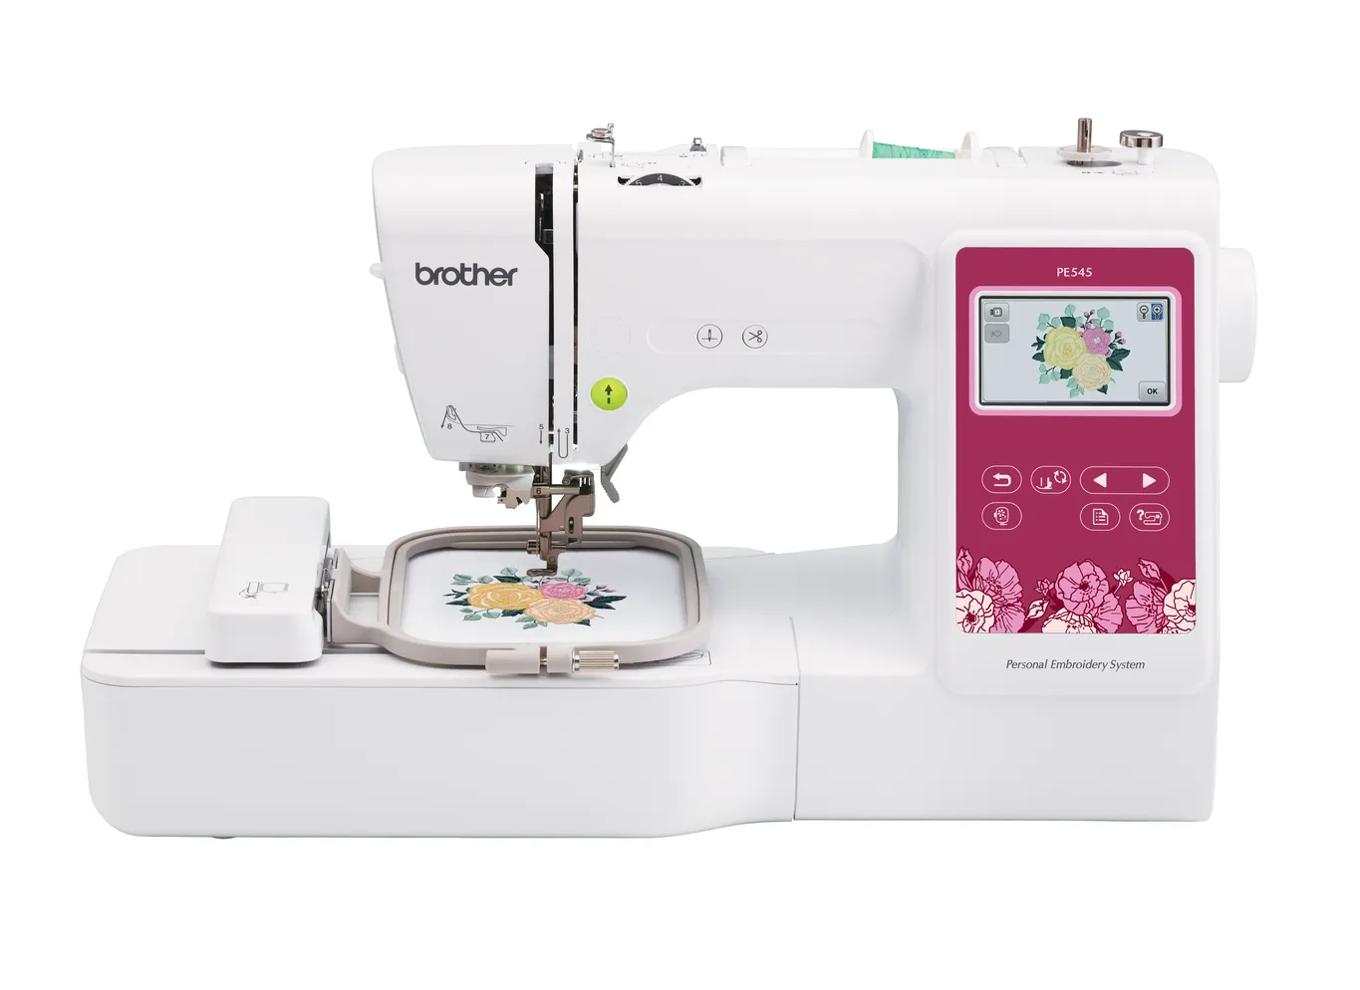
Brother PE545
Best for: Beginners who already own a sewing machine and mainly want monograms, names, patches and small motifs.
- Field4 × 4 in (100 × 100 mm)
- TypeEmbroidery only
- Built-in designs135
- Max speed400 spm
- TransferUSB, Wi-Fi, Artspira app
Why pick it
- Embroidery-only, so you are not paying for sewing features you may not need
- Wireless transfer and Artspira support, which the PE535 lacked
- 135 built-in designs and 10 fonts cover first projects
Think twice if
- 100 × 100 mm field limits design size
- Max speed of 400 spm is lower than the 5 × 7 models
- Cannot sew seams; you still need a sewing machine
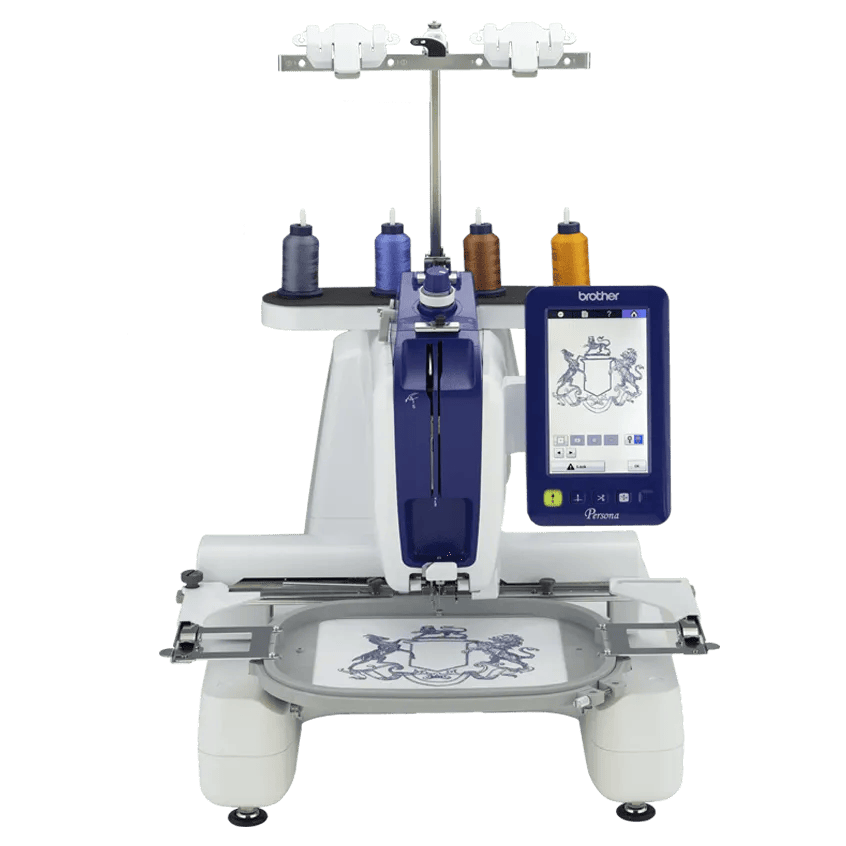
Brother PRS100 (Persona)
Best for: Hobbyists and small sellers who want hats, sleeves and bags on a single-needle machine with a free arm.
- Field8 × 8 in (200 × 200 mm)
- TypeEmbroidery only
- Built-in designs445
- Max speed1000 spm
- TransferUSB
Why pick it
- Cap frame capable with a free arm
- 8 × 8 field and up to 1,000 spm
- Six frames included
Think twice if
- Single needle despite the commercial styling
- USB only, no wireless listed
- Brother’s page lists both 445 and “over 405” designs
Patches are one of the best first projects in machine embroidery: small, quick to stitch, and genuinely useful on jackets, bags and hats. But patch-making has its own equipment logic — field size for 3–4 inch designs, hooping small stiff pieces, and the stabilizer and thread basics that keep edges crisp. This guide covers all three, with starter machine picks from maker specs. Check current prices on each card above; everything here comes from maker specs and manuals.
What field size do patches actually need?
Less than most beginners expect. A finished 3-inch patch needs roughly 3.5 inches of hoop room once you count stabilizer margins and the satin-stitch border. That gives simple rules:
| Patch size | What you need | Example pick |
|---|---|---|
| Up to ~2–3 in | 4 × 4 field is enough | PE545 or SE700 |
| ~3–4 in, or multiples per hooping | 5 × 7 field | PE900 |
| Patches plus hats and sleeves | Free arm, 8 × 8 field | PRS100 |
| Machine | Type | Field | Max embroidery speed | Transfer |
|---|---|---|---|---|
| PE545 | Embroidery-only | 4 × 4 | 400 spm | USB, Wi-Fi, Artspira |
| SE700 | Combo | 4 × 4 | 400 spm | USB, Wi-Fi, Artspira |
| PE900 | Embroidery-only | 5 × 7 | 650 spm | USB, Wi-Fi, Artspira |
| PRS100 | Embroidery (free arm) | 8 × 8 | 1,000 spm | USB |
If you are not sure, measure a patch you want to make and drop it into the hoop fit checker. And if patches might grow into T-shirt fronts and totes, read our T-shirt machine guide before deciding — the field logic is the same.
Which patch machine should you choose?
Use these rules before you read the details:
- Choose the PE900 if patches are the hobby and some will reach 3–4 inches, or you want several patches per hooping. Brother lists a 5 × 7 field, 193 designs, 13 fonts and up to 650 spm.
- Choose the PE545 if your patches stay small (2–3 inches) and you already sew on another machine or don’t need to. Same patch workflow as the PE900 in a 4 × 4 field for less machine.
- Choose the SE700 if you also need to sew and your patches stay small. Brother lists 135 designs, 103 sewing stitches and wireless transfer in the same 4 × 4 field.
- Choose the PRS100 if you also want hats, sleeves and bags. Brother lists cap frame capability, a free arm, six included frames and up to 1,000 spm — but it is still single needle, so every color change is manual.
Not sure which rule fits you? The machine finder asks about design size, sewing and transfer method and returns a short list.
Hooping small items without the struggle
Hooping is the real patch skill, and stiff twill in a small hoop is where beginners struggle most. Three approaches, easiest first:
- Hoop the stabilizer, float the twill. Hoop a piece of adhesive stabilizer (or plain cut-away with a light spray of temporary adhesive), then smooth the twill on top. The fabric never fights the hoop. Our hooping guide walks through floating step by step.
- Mark placement first. A water- or air-erasable pen for center lines keeps the design where you planned it — re-hooping a half-stitched patch wastes twill. See the placement guide for positioning basics.
- Stabilizer choice matters more than hoop force. Cut-away is the default for patches (they get flexed and washed); tear-away suits stiff woven twill during stitching but offers less lasting support. Details in our stabilizer types guide and the T-shirt stabilizer guide.
Small sharp scissors or snips for trimming jump stitches and borders cleanly are worth having from day one — curved appliqué scissors in particular, since patch borders reward close trimming much like appliqué does.
Borders and edges: getting the finished look
The border is what makes a patch look like a patch instead of a scrap of stitched twill. Three approaches, in order of difficulty:
- Satin-stitch border in the design. Most patch designs end with a wide satin border that seals the twill edge. Stitch it over cut-away stabilizer, then trim the twill close to the border with curved scissors. This is the beginner method and looks genuinely good.
- Faux-merrowed edge. A dense, slightly rounded satin column mimics the classic merrowed border. It needs a well-digitized file — if you digitize your own, our digitizing guide covers satin columns, and bought patch files usually include the border layer.
- Heat-seal or iron-on backing. After stitching and trimming, a heat-seal backing film (applied with a heat press or iron) tidies the back, stops fraying and lets the patch be ironed on as well as sewn. It is optional for sewn-on patches, near-essential for iron-on ones.
Whichever edge you choose, test the full sequence — stitch, trim, back, wash once — on scrap twill before committing to a batch. Border density that looks perfect fresh off the machine can pucker after washing if the stabilizer was too light, which is why the stabilizer types guide recommends cut-away as the default for anything that flexes.
Batch workflow: from one patch to twenty
Single patches are practice; small batches are where machine choice pays. The workflow that scales:
- Gang up designs per hooping. A 5 × 7 field fits two to three small patch designs per hooping; an 8 × 8 field fits more. Fewer hoopings means less stabilizer, less setup time and more consistent placement. This is the concrete reason the PE900 beats 4 × 4 machines for batch makers.
- Repeat the same thread sequence. Run all patches through color one before switching to color two, rather than finishing patches one at a time. On single-needle machines every color change is a manual re-thread, so batching colors is the biggest available time saving short of a multi-needle machine.
- Trim assembly-line style. Stitch the whole batch, then trim all borders, then apply all backings. Curved scissors and snips earn their keep here.
- Track stitch counts and time. Dense 3–4 inch patches can run 15,000–25,000 stitches — at 400–650 spm plus color changes, that’s real time per patch. Our stitch time calculator estimates it before you promise a batch to anyone, and the pricing calculator turns materials plus time into a price if you sell.
If batches get serious — dozens of multi-color patches a month — the single-needle color-change bottleneck is what eventually justifies a multi-needle machine. Our single vs multi-needle guide explains that upgrade point, and the pricing guide covers charging for the work.
Thread, needles and the patch recipe
The default patch recipe is simple: 40-weight polyester embroidery thread on top, matching bobbin thread below, a fresh 75/11 embroidery needle, and medium-weight cut-away stabilizer under twill. Polyester resists fading and washing better than rayon, which matters for patches that live outdoors on jackets and bags. Our thread guide covers brands and weights, and the startup budget calculator totals the machine plus supplies before you buy.
Two beginner traps: an old or wrong-size needle (patch borders are dense satin stitch — change needles often), and skipping test stitch-outs on scrap twill before the real patch.
When does a bigger machine pay off?
A 4 × 4 machine stitches one small patch per hooping. A 5 × 7 machine stitches a 3–4 inch patch comfortably — or two to three small patches per hooping, which halves the hooping labor on batches. The PRS100 goes further with cap capability for actual hats (see our hat guide for that path) and six included frames.
If you plan to sell patches, the math changes: single-needle color changes dominate your time on multi-color designs, and our small business machine guide explains when a multi-needle machine earns its keep. For everyone else, start with the field size your patches need and upgrade only when batches, not curiosity, demand it.
Spec comparison
| Model | Field | Type | Designs | Max speed | Transfer | Shop |
|---|---|---|---|---|---|---|
| Brother PE545 | 4 × 4 in | Embroidery only | 135 | 400 spm | USB, Wi-Fi, Artspira app | Check price ↗ |
| Brother PE900 | 5 × 7 in | Embroidery only | 193 | 650 spm | USB, Wi-Fi, Artspira app | Check price ↗ |
| Brother PRS100 (Persona) | 8 × 8 in | Embroidery only | 445 | 1000 spm | USB | Check price ↗ |
| Brother SE700 | 4 × 4 in | Sewing + embroidery | 135 | 400 spm | USB, Wi-Fi, Artspira app | Check price ↗ |
What to buy
- Shop on Amazon ↗
Cut-away stabilizerStart here
Permanent support for knits, T-shirts, sweatshirts and anything that stretches. Medium weight suits most first projects; buy enough to test before the real garment. Learn more
- Shop on Amazon ↗
Tear-away stabilizerStart here
Temporary support for stable wovens such as canvas, denim, twill and quilting cotton. Tear gently while supporting the stitches; not a substitute for cut-away on stretchy fabric. Learn more
- Shop on Amazon ↗
40 wt polyester embroidery thread setStart here
A starter range of colors in the weight most home designs are digitized for. Make sure it is embroidery thread (not all-purpose sewing thread) and the spool fits your machine pin. Learn more
- Shop on Amazon ↗
Embroidery bobbin thread or prewound bobbinsStart here
Lighter bobbin thread keeps the back of the design flat and reduces bulk. Prewound bobbins must match your machine’s bobbin class; confirm in the manual before buying. Learn more
- Shop on Amazon ↗
Embroidery needles (75/11)Start here
Embroidery needles have a larger eye and groove that protect rayon and polyester thread at speed. Use the needle system your manual specifies; buy a ballpoint pack for knits. Learn more
- Shop on Amazon ↗
Curved embroidery or appliqué scissorsStart here
Trim jump stitches and appliqué fabric close to stitches without lifting the hoop off the machine. Small, sharp curved blades are easier to control than full-size shears. Learn more
- Shop on Amazon ↗
Water- or air-erasable marking penStart here
Mark center lines and placement before hooping so the design lands where you planned. Test that the mark disappears from your fabric before marking a garment. Learn more
Frequently asked questions
What size embroidery machine do I need for patches?
A 4 × 4 machine covers patches up to about 3 inches with stabilizer margin. For 3–4 inch patches, or stitching several patches per hooping, a 5 × 7 machine like the PE900 is the comfortable choice. Check your patch size against each field with the hoop fit checker.
What stabilizer should I use for patches?
Cut-away stabilizer is the default: patches get handled, washed and sewn onto garments, so they need permanent support. Tear-away suits stiff woven twill during stitching but cut-away lasts longer on anything that flexes. Our stabilizer types guide covers the full decision.
Can I make patches with a 4 × 4 embroidery machine?
Yes, for small patches: names, 2–3 inch motifs and left-chest style designs fit a 4 × 4 field. What you cannot do is 3–4 inch patches with border margins, or multiples per hooping. If patches are the whole hobby, a 5 × 7 machine avoids an early upgrade.
Do I need special software to make patches?
Not at first. Built-in designs and fonts cover practice patches, and free options like Embrilliance Express (lettering) and Ink/Stitch (open-source digitizing) handle first custom work. A merrowed edge needs either a steady satin-stitch border in your design or a separate edging step.
Sources & method
This guide is compiled from manufacturer documentation and specialist sources, not hands-on testing. We link every source so you can check it. Specifications change, so confirm details against your exact model manual. How we research.